Tag Archives: games

JavaFX 2 GameTutorial Part 5

JavaFX sound effects

Figure 1: JavaFX Sound FX

Introduction

This is part five of a six part series related to a JavaFX 2 Game Tutorial. I know it’s been a long time since I blogged about gaming, but hopefully you’re still with me. If you would like a recap, please read Part 1Part 2Part 3, and Part 4 to find out where we left off. If you are up to date, then let’s get started!  In this blog entry we will be incorporating sounds into our game.

There are many elements which make games incredibly fun such as animated effects, collisions, AI, and input. However, one of the most important ingredients to game play is sound. When games incorporate sound effects and music, the gamer will become highly immersed (ugh… like not realizing you are about to see the sun rise). Before we get into the details, let me give you some background history on sound used in PC games for the home computer. If you want to skip the history and get down to business, jump to the section called the ‘Sound Manager Service.’ The Sound Manager Service is responsible for maintaining sound assets used during the game. If you are really impatient and don’t care about the implementation details, jump down to ‘JavaFX Sound Demo.’ Important note: Remember to read the requirements before launching the demo.

History

If you want to understand today, you have to search yesterday.  ~Pearl Buck 

Back in the day, when I was growing up, I learned that the Apple ][ computer was capable of playing sounds. The Apple ][ had one speaker that was only able to produce simple tones (8 bit mono sound). When I first generated tones (Mary had a little lamb), I was totally amazed. If you are interested in machine code using Applesoft Basic’s peek and poke commands to compose music, visit 8 bit Sound and Fury.  Even though 8 bits seemed very simple (because there were so few values), it was not. When creating sound effects for games, one of the most difficult things to manage was the timing or duration of the tones in conjunction with the sprites flying across the screen in a (near) simultaneous fashion. In the 90s during  the reign of the Intel x86 architecture (the PC), the most popular sound card was called the Sound Blaster 16 made by Creative Technologies. In its prime, this sound card was quite amazing when playing games because it was a separate card having a chip set with the ability to play midi sounds and music in stereo (two channels). The sound card was bundled with a CD rom player allowing one to pop in a music CD. Another cool feature of the Sound Blaster was its 15-pin MIDI/Joystick multiport enabling game input devices to be connected. Today (the future), sound cards are able to support surround sound (3D audio effects), various sound formats, record, various music formats, midi, and mixing.  Multitasking enables modern computers to  play sounds/music on parallel tracks (simultaneously).

Next, we will be creating a sound manager service that will be added to the game engine framework library (JFXGen).

Sound Manager Service

The GameWorld class contains services such as the sprite manager and (more recently) a reference to an instance of a SoundManager (singleton). The sound manager service is responsible for managing all of the game’s sound effects. This service allows the developer to load sound clips (AudioClip) using the loadSoundEffects() method. After loading sound effects each audio clip can be retrieved using a unique id (String) mapped to the sound. The last method is the shutdown() method. When the application is exited, the stop method will invoke the GameWorld‘s shutdown() method which, in turn, calls the SoundManager object’s shutdown to clean up any resources. The SoundManager instance has a thread pool that gets gracefully shutdown.

Note:  For brevity, I designed the SoundManager class to play simple audio clips, though not music, during the game. If you want to add music, please refer to the JavaDoc on the Media and MediaPlayer APIs.

Shown below is the SoundManager class diagram:

SoundManager Class Diagram

Figure 2: Class Diagram of the Sound Manager

The following is source code for the SoundManager class:

package carlfx.gameengine;

import javafx.scene.media.AudioClip;

import java.net.URL;
import java.util.HashMap;
import java.util.Map;
import java.util.concurrent.ExecutorService;
import java.util.concurrent.Executors;

/**
 * Responsible for loading sound media to be played using an id or key.
 * Contains all sounds for use later.
*</pre>
<pre> * User: cdea
 */
public class SoundManager {
    ExecutorService soundPool = Executors.newFixedThreadPool(2);
    Map<String, AudioClip> soundEffectsMap = new HashMap<>();

    /**
     * Constructor to create a simple thread pool.
     *
     * @param numberOfThreads - number of threads to use media players in the map.
     */
    public SoundManager(int numberOfThreads) {
        soundPool = Executors.newFixedThreadPool(numberOfThreads);
    }

    /**
     * Load a sound into a map to later be played based on the id.
     *
     * @param id  - The identifier for a sound.
     * @param url - The url location of the media or audio resource. Usually in src/main/resources directory.
     */
    public void loadSoundEffects(String id, URL url) {
        AudioClip sound = new AudioClip(url.toExternalForm());
        soundEffectsMap.put(id, sound);
    }

    /**
     * Lookup a name resource to play sound based on the id.
     *
     * @param id identifier for a sound to be played.
     */
    public void playSound(final String id) {
        Runnable soundPlay = new Runnable() {
            @Override
            public void run() {
                soundEffectsMap.get(id).play();
            }
        };
        soundPool.execute(soundPlay);
    }

    /**
     * Stop all threads and media players.
     */
    public void shutdown() {
        soundPool.shutdown();
    }

}

How do I play sound effects in JavaFX?

In JavaFX 2, you can play small sound files efficiently with less overhead by using the AudioClip API. This API allows a sound to be played repeatably. An example would be a gamer firing the weapon (left mouse press) which makes a laser sound “pew pew!” Speaking of lasers in the demo game, I used a free sound file from the website FreeSound.org having the Creative Commons license. Since the file was a wav file format, it was larger than it needed to be. So, I decided to convert the file to an mp3 sound format. I felt it was important to reduce the size of the file (smaller footprint) for faster loading. When converting the file to an mp3 sound format, I used Sony’s Sound Forge software. Shown below is a code snippet to play small sound files:

   AudioClip sound = new AudioClip("laser.mp3");
   sound.play();

How do I play music in JavaFX?

Although the SoundManager(my implementation) doesn’t play music, it is easy to add the capability. The following code snippet shows how to load an MP3 file to be played using the Media and MediaPlayer API:

   Media media = new Media("hymetojoy.mp3");
   MediaPlayer player = MediaPlayerBuilder.create()
                         .media(media)
                         .onReady( new Runnable() {
                             @Override
                             public void run() {
                                player.play();
                             })
                         .build();

JavaFX Sound Demo

Requirements:

  • Java 7 or later
  • JavaFX 2.1 or later
  • Windows XP or later (Should be available soon for Linux/MacOS)

A simple Asteroid type game called ‘The Expanse’.

Instructions:

  • Right mouse click (on Windows) to fly ship.
  • Left mouse click (left click on Windows mouse) to fire weapon.
  • Key press ’2′ to change to large missiles. (blue circular projectiles)
  • Other key press defaults to smaller missiles. (red circular projectiles)
  • Space bar key press will toggle a force field to protect the ship from enemies and asteroids.

Click on the Launch button below to start the demo:

Tutorial demo

Part 5 ‘The Expanse’ Sound

References

Apple ][ specs: http://apple2history.org/history/ah03/
8 bit on the Apple ][: http://eightbitsoundandfury.ld8.org/programming.html
Sound Blaster : http://en.wikipedia.org/wiki/Sound_Blaster
JFXGen: https://github.com/carldea/JFXGen
JavaFX’s AudioClip API: http://docs.oracle.com/javafx/2/api/javafx/scene/media/AudioClip.html
Sony Sound Forge: http://www.sonycreativesoftware.com/soundforgesoftware
Freesound.org: http://www.freesound.org
Laser sound from Freesound.org: http://www.freesound.org/people/THE_bizniss/sounds/39459/
Creative commons license: http://creativecommons.org/licenses/sampling+/1.0/
Media API: http://docs.oracle.com/javafx/2/api/javafx/scene/media/Media.html
MediaPlayer API: http://docs.oracle.com/javafx/2/api/javafx/scene/media/MediaPlayer.html

JavaFX 2 GameTutorial Part 4

JavaFX 2 Game Tutorial Part 4

Figure 1 JavaFX 2 Game Tutorial Part 4


Introduction

This is part four of a six part series related to a JavaFX 2 Game Tutorial. If you’ve missed Part 1, Part 2, or Part 3, I encourage you to go through them before beginning this tutorial. To recap, in Part 3 I gave you a little history of the many classic arcade style games and the different input devices that were used. I then showed you how to create a simple game similar to the famous arcade ‘Asteroids’. The controls (movement of the ship) were, however, more similar to those of the PC game ‘Star Craft’. In Part 3, you should have a good understanding of how to receive input from your keyboard and mouse.

This tutorial is about tweaking Part 2’s game engine and updating the existing ‘Asteroids’ style game from Part 3 to handle collision detection. In this tutorial, I will briefly talk about sprites and how to handle collision detection. The spaceship will now have the ability to generate a force field to protect itself from enemies and asteroids. This is reminiscent of the classic arcade ‘Asteroids Deluxe’.  If you want to run the demo, scroll down and click on the WebStart button below. Please read the requirements before launching the game.

What is a Sprite?

According to Wikipedia, “a sprite is a two-dimensional image or animation that is integrated into a larger scene.” From the Java gaming world view, a sprite is an object containing image frames and additional data based on the context of an actor to be animated onto the scene area. In the days of Walt Disney, when cartoons were drawn with a pencil and paper, the artist  produced many drawings that became animations. This example points to the creation of the flip book. I’m sure you’ve created flip books as a kid. I know I did. I used to doodle and make cool animations with all the corners of my notebooks. In our Asteroid type game, I created a sprite object which contains all of the images (ImageView) of the ship pre-rotated just like a flip book. To animate the ship turning, I made the current frame visible and the rest of the frames not visible. Similar to a flip book, it will appear to be rotated about its center (pivot) point. A sprite can also contain other information, such as velocity or health points.

Collision Detection

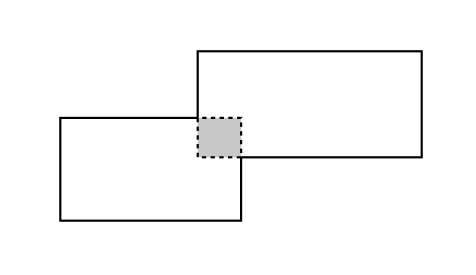
When actors or sprites animate across the scene, the game engine will check each sprite against other sprites to determine if they have collided into one another. This process should be very efficient especially when you have numerous sprites moving about the screen. There are tradeoffs when it comes to being efficient. Because each cycle in the game loop will check for collision, being more accurate usually degrades your performance. Many games will use the bounding region of the image to determine if two sprites have collided into one another.  Some games use rectangles as bounding regions. Shown below in figure 2 are two sprites colliding:

Bounding box as a rectangular collision region.

Figure 2 Bounding box as a rectangular collision region.

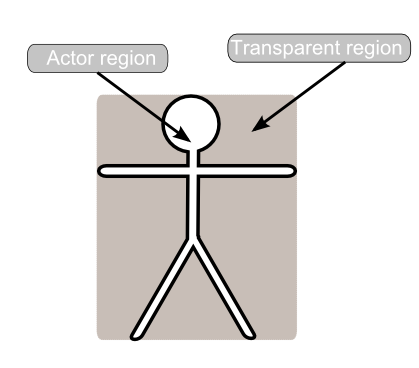
I’m sure you’ll know by now that most actors (images) in games don’t appear rectangular when pixels surrounding the actor are transparent. However, the actor or image is indeed rectangular even if the pixels are transparent or not.


Actor Image

Figure 3 depicts an actor image

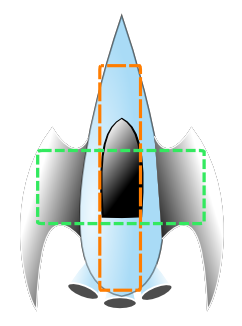
Those games which use rectangular bounding regions usually make the bounding box inscribed in the sprite’s image. Shown below in figure 4 two rectangular bounding regions (orange and green) are inscribed in the spaceship image.

Two rectangles used as collision bounding boxes.

Figure 4 Two rectangles used as collision bounding boxes.

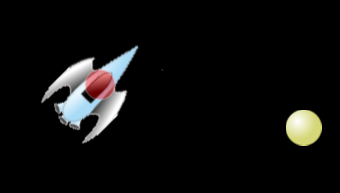
I’m sure you will notice that the nose tip of the ship and wings are not covered by either bounding box. This means that when an asteroid overlaps the unbounded region of the sprite the collision will not occur. Some games use this strategy; you will notice that the sprites’ rectangular bounding regions are small and placed in key areas of the sprite image.  Greater precision will be found with better algorithms for polygons and other non-rectangular shapes. In this blog entry, I basically use circles as bounding regions and not rectangles. I could have made each sprite contain an array of collision shapes, but instead, I chose to have only one collision region for each sprite. Each collision region will be a circle shape on the scene graph. For the spaceship, I inscribed the circle based on the center point of the ship with the radius extended to the cock pit of the ship. Shown below in figure 5 the bounded circular collision area of the ship is depicted as a red circle.

The ship's collision region.

Figure 5 The ship’s collision region.

I chose a circle as the bounding region because of the relative ease to determine the collision of two objects based on the distance formula (Pythagorean theorem) which only requires each sprite’s bounding region’s center point and their radii.  After calculating the distance based on the two center points, you will compare the result to see if it is less than or equal to the sum of the two radii. If the result does indeed come out to be less than or equal to the sum of the two radii then a collision has occurred.  Figure 6 depicts  how the distance formula relates to the two center points of circular bounding regions.

Distance formula

Figure 6 distance formula between two center points.

The following code creates the main game loop from the GameWorld class:

  @Override
  public void handle(javafx.event.ActionEvent event) {

     // update actors
     updateSprites();

     // check for collision
     checkCollisions();

     // removed dead things
     cleanupSprites();

  }

The code below creates the checkCollision() method from the GameWorld class:

    protected void checkCollisions() {
        // check other sprite's collisions
        spriteManager.resetCollisionsToCheck();
        // check each sprite against other sprite objects.
        for (Sprite spriteA : spriteManager.getCollisionsToCheck()) {
            for (Sprite spriteB : spriteManager.getAllSprites()) {
                if (handleCollision(spriteA, spriteB)) {
                    // The break helps optimize the collisions
                    //  The break statement means one object only hits another
                    // object as opposed to one hitting many objects.
                    // To be more accurate comment out the break statement.
                    break;
                }
            }
        }
    }

The derived Game World (TheExpanse) class’ implementation of its handleCollision() method:

    /**
     * How to handle the collision of two sprite objects.
     *
     * @param spriteA Sprite from the first list.
     * @param spriteB Sprite from the second list.
     * @return boolean returns a true if the two sprites have collided otherwise false.
     */
    @Override
    protected boolean handleCollision(Sprite spriteA, Sprite spriteB) {
        if (spriteA != spriteB) {
            if (spriteA.collide(spriteB)) {

                if (spriteA != myShip) {
                    spriteA.handleDeath(this);
                }
                if (spriteB != myShip) {
                    spriteB.handleDeath(this);
                }
            }
        }

        return false;
    }

The Sprite Class’ default implementation of its collide() method using the distance formula:

    public boolean collide(Sprite other) {

        if (collisionBounds == null || other.collisionBounds == null) {
            return false;
        }

        // determine it's size
        Circle otherSphere = other.collisionBounds;
        Circle thisSphere = collisionBounds;
        Point2D otherCenter = otherSphere.localToScene(otherSphere.getCenterX(), otherSphere.getCenterY());
        Point2D thisCenter = thisSphere.localToScene(thisSphere.getCenterX(), thisSphere.getCenterY());
        double dx = otherCenter.getX() - thisCenter.getX();
        double dy = otherCenter.getY() - thisCenter.getY();
        double distance = Math.sqrt(dx * dx + dy * dy);
        double minDist = otherSphere.getRadius() + thisSphere.getRadius();

        return (distance < minDist);
    }

The Sprite Class’ default implementation of its handleDeath() method:

    public void handleDeath(GameWorld gameWorld) {
        gameWorld.getSpriteManager().addSpritesToBeRemoved(this);
    }

The Atom (an asteroid or missile) class will override the handleDeath() method:


    public void handleDeath(GameWorld gameWorld) {
        implode(gameWorld);
        super.handleDeath(gameWorld);
    }

JavaFX 2 Sprite and Collision Demo

This simple demo game will be a mix between StarCraft and Asteroids. When using the mouse to navigate the ship, you will notice that the controls will resemble StarCraft’s Battle Cruiser. The objective is to fire your weapon at the spheres before they hit your spaceship or other spheres which implode upon impact. Because this is a simple tutorial or even a game in its early stages of development, the game doesn’t keep track of the score. I encourage you to go to GitHub to download the code and enhance the game. For the sake of brevity, I will not be showing all of the code changes, but I trust you will visit GitHub here: https://github.com/carldea/JFXGen for all the demos and source code.

Requirements:

  • Java 7 or later
  • JavaFX 2.1 or later
  • Windows XP or later (Should be available soon for Linux/MacOS)

A simple Asteroid type game called ‘The Expanse’.

Instructions:

  • Right mouse click (on Windows) to fly ship.
  • Left mouse click (left click on Windows mouse) to fire weapon.
  • Key press ’2′ to change to large missiles. (blue circular projectiles)
  • Other key press defaults to smaller missiles. (red circular projectiles)
  • Space bar key press will toggle a force field to protect the ship from enemies and asteroids.

Click on the Launch button below to start the demo:

Tutorial demo

Part 4 ‘The Expanse’ sprites/collision

Part 4 ‘Sprites/Collision’

Next up is Part 5 (Sound) where you will be using JavaFX to produce sound effects for your game.

References

Definition of a sprite: http://en.wikipedia.org/wiki/Sprite_%28computer_graphics%29

Walt Disney: http://en.wikipedia.org/wiki/Walt_Disney

How to make a flip book: http://www.bitrebels.com/design/how-to-create-a-flip-book/

JavaFX’s ImageView : http://docs.oracle.com/javafx/2/api/javafx/scene/image/ImageView.html

Collision detection: http://zetcode.com/tutorials/javagamestutorial/collision/

AABBs Collision detection in Java: http://www.youtube.com/watch?v=JIxV-LXqa1g

Pythagorean theorem: http://en.wikipedia.org/wiki/Pythagorean_theorem

Distance formula: http://en.wikipedia.org/wiki/Distance

Serious game of Asteroids Deluxe (Youtube): http://www.youtube.com/watch?v=6DG-GJENHgg

JavaFX 2 GameTutorial Part 3

The Expanse

figure 1 The Expanse – Input (Keyboard & Mouse) Demo

Introduction

This is part 3 of a six part series related to a JavaFX 2 Game Tutorial. If you’ve missed Part 1 and Part 2, I encourage you to go through them before beginning this tutorial. To recap Part 2 I discussed the inner workings of a gaming loop where we used an animation (JavaFX Timeline) to update sprites, check collisions, and clean up game world elements. I then felt compelled to create a simple game engine to enable the ease of developing 2D games. This tutorial is about using the game engine and demonstrating input using your mouse and keyboard. In this tutorial I will give you some background history, event handling fundamentals, a demo game, and finally the implementation. The demo will showcase a spaceship capable of shooting at floating spheres similar to the video game Asteroids. If you want to run the demo, scroll down and click on the WebStart button below. Please read the requirements before launching the game.

History

Back in the day (during the 80s) as a kid growing up there were arcade centers, bowling alleys, pizza parlors, and 7 Eleven stores where I spent huge amounts of time putting quarters on the glass display areas to be next in line to the guy who was currently playing an intense video game. As everyone was crowded around him watching him beat the all time high score we all cheered as we witnessed greatness. One of those incredibly awesome arcade games was ‘Asteroids‘ created by Atari Inc.(to play visit play.vg)

Speaking of high scores, not too many folks know, but Scott Safran (February 3, 1967 – March 27, 1989) had the highest record of all time playing Asteroids. He achieved this at his local 7-Eleven conveniece store by playing for approximately twenty hours non stop. Later in life (while still young), he passed away from a tragic accident on March 27, 1989. In honor of Scott, I created this tutorial. I hope people will remember him as one of the greatest video gamers of all time (I’m sure a good brother and son also).

Regarding the game, Asteroids, vector based hardware was used to render shapes as opposed to raster graphics (bitmap). On an added note, Space Invaders by Midway Inc. was created using raster graphics. It’s exciting to point out that there are discussions about JavaFX 2.x having the ability to use bitmaps called the JavaFX Canvas Node which can provide raster graphics to enable developers to take advantage of pixel level manipulations. I am still amazed at the construction of these arcade style cabinets which house the CRT, motherboard, and the controllers (input devices) such as buttons, joystick, track balls, and turning knobs.

Classic Arcade Games

Below are some classic arcade games with many types of input devices:

  • Buttons only: Asteroids, Space Invaders, Rip Off, Phoenix
  • Joystick only: Q*bert, PacMan
  • Turn knob only: Pong
  • Track ball only: Marble Madness
  • Steering column and buttonsStar Wars, Pole position, Spy Hunter
  • Bike handle bars: Stunt Cycle, Paper Boy
  • Buttons and Throttle bar: Lunar Lander
  • Periscope and Buttons: Sea Wolf
  • Buttons and Yoke: Tron, Battle Zone
  • Buttons, Turn knob, and Yoke:  Star Trek, Tempest
  • Buttons and track ball: Missile Command, Centipede
  • Buttons and Joystick: Defender, Gauntlet, Frogger, Joust, Berzerk, Mario Bros., Donkey Kong, Xevious, Galaga, Kung Fu, Contra, Street Fighter, Double Dragon, Ninja magic (or spirit), DigDug, Dragon’s Lair.

Input / (Mouse, Keyboard)

Leaving the past behind, we currently encounter new kinds of input devices such as touch screens, accelerometers, infrared receivers, cameras, etc. The most common input on the desktop today is the mouse and keyboard. Of course, touch screen is all the rage with mobile devices and tablets, however in this tutorial we will only be focusing on the ‘Mouse‘ and ‘Keyboard‘ as inputs to control your game. Based on the JavaFX Roadmapmulti-touch input is in the works (by the time you read this it’s already implemented).

When intercepting keyboard and mouse events, JavaFX 2.x has many types of events which provide an opportunity for the developer to implement event handlers that intercept the events triggered. The JavaFX 2.x API for the Node or Scene contains many methods having the prefix ‘on’ such as the onMousePressProperty() or onKeyPressProperty() method. Whenever you implement these methods you will simply implement the handle() method using Java’s generic type to specify the event object to be passed in for interrogation. So, when you instantiate an EventHandler<MouseEvent> class you will implement a handle() method that takes a MouseEvent as a parameter to be passed in.

The code snippets shown below add two event handlers to the JavaFX Scene. The first handler will respond to mouse events. In our simple game when a mouse press occurs, this handler will respond by firing the weapon or navigating the ship. The second handler shown below will respond to key event. When a key is pressed, this handler will process KeyEvent objects. In our game, the keystroke ‘2‘ will change your secondary weapon into a bigger blaster (slower). Any other keystroke will default back to the smaller blaster (faster).

Move ship and Fire weapon

        EventHandler fireOrMove = new EventHandler() {
            @Override
            public void handle(MouseEvent event) {
                if (event.getButton() == MouseButton.PRIMARY) {
                   // Fire weapon systems. On Windows left mouse button
                } else if (event.getButton() == MouseButton.SECONDARY) {
                   // Navigate ship thrust. On Windows right mouse button
                }
            }
        };
        primaryStage.getScene().setOnMousePressed(fireOrMove);

Changing the weapon

        EventHandler changeWeapons = new EventHandler() {
           @Override
           public void handle(KeyEvent event) {
               myShip.changeWeapon(event.getCode());
           }
        };
        primaryStage.getScene().setOnKeyPressed(changeWeapons);

JavaFX 2 Input Demo – ‘The Expanse’

The simple demo game will be a mix between StarCraft and Asteroids. When using the mouse to navigate the ship it will resemble StarCraft’s Battle Cruiser. If you remember from Part 2 of this series, I created spheres bouncing around. I reused the code from Part 2 ‘Atom Smasher’ to act as asteroids like in the famous arcade game. Except in this game you cannot get harmed at all. The objective is to fire your weapon at the spheres before they hit other spheres which implode upon impact. Because this is a simple tutorial, or even a game in its early stages of development, the game doesn’t keep track of the score. I encourage you to go to GitHub to download the code and enhance the game. Later, you will see a high level UML class diagram describing the classes that make up the game. For the sake of brevity, I will not be going through each class in great detail, but I trust you will visit GitHub here: https://github.com/carldea/JFXGen for all the demos and source code.

Requirements:

  • Java 7 or later
  • JavaFX 2.1 or later
  • Windows XP or later (Should be available soon for Linux/MacOS)
A simple Asteroid type game called ‘The Expanse’.

Instructions:

  • Right mouse click (on Windows) to fly ship.
  • Left mouse click (left click on Windows mouse) to fire weapon.
  • Key press ‘2’ to change to large missiles. (blue circular projectiles)
  • Other key press defaults to smaller missiles. (red circular projectiles)
Part 3 Demo
Part 3 ‘The Expanse’

Shown below is figure 2 of a high level class diagram depicting all the classes created for this demo. The GameWorld and Sprite classes are part of the game engine from the previous post. The rest of the classes are new which make up this demo for this tutorial.


InputPart3

The InputPart3 is the driver or main JavaFX application that runs the game. This creates a GameWorld object to be initialized and starts the game loop.
Shown below is the source code of the main JavaFX application InputPart3 . Click to expand.

package carlfx.demos.navigateship;

import carlfx.gameengine.GameWorld;
import javafx.application.Application;
import javafx.stage.Stage;

/**
 * The main driver of the game.
 * @author cdea
 */
public class InputPart3 extends Application {

    GameWorld gameWorld = new TheExpanse(59, "JavaFX 2 GameTutorial Part 3 - Input");
    /**
     * @param args the command line arguments
     */
    public static void main(String[] args) {
        launch(args);
    }

    @Override
    public void start(Stage primaryStage) {
        // setup title, scene, stats, controls, and actors.
        gameWorld.initialize(primaryStage);

        // kick off the game loop
        gameWorld.beginGameLoop();

        // display window
        primaryStage.show();
    }

}

TheExpanse

The TheExpanse class inherits from the GameWorld class.  This is practically identical to Part 2’s ‘AtomSmasher’ where the driver application will invoke the GameWorld instance’s initialize() method to set up all the game elements such as the input, spaceship, and those pesky floating spheres. The job of this class is to make sure asteroids or spheres bounce off walls and remove any missiles which reach the edge of the screen. It’s main responsibly is to manage the assets and create new levels. When there are no moving objects and the player moves the ship on the screen new spheres will be generated for the next level. The key take away from this class is the setupInput() method. The setupInput() method which I created is responsible for establishing your event handlers to be able to listen to key events and mouse event.

package carlfx.demos.navigateship;

import carlfx.gameengine.GameWorld;
import carlfx.gameengine.Sprite;
import javafx.event.ActionEvent;
import javafx.event.EventHandler;
import javafx.scene.CacheHint;
import javafx.scene.Group;
import javafx.scene.Node;
import javafx.scene.Scene;
import javafx.scene.control.Button;
import javafx.scene.control.Label;
import javafx.scene.control.TextField;
import javafx.scene.input.KeyEvent;
import javafx.scene.input.MouseButton;
import javafx.scene.input.MouseEvent;
import javafx.scene.layout.HBox;
import javafx.scene.layout.VBox;
import javafx.scene.paint.Color;
import javafx.scene.shape.Circle;
import javafx.stage.Stage;

import java.util.Random;

/**
 * This is a simple game world simulating a bunch of spheres looking
 * like atomic particles colliding with each other. When the game loop begins
 * the user will notice random spheres (atomic particles) floating and
 * colliding. The user will navigate his/her ship by right clicking the mouse to
 * trust forward and left click to fire weapon to atoms.
 *
 * @author cdea
 */
public class TheExpanse extends GameWorld {

    // mouse pt label
    Label mousePtLabel = new Label();

    // mouse press pt label
    Label mousePressPtLabel = new Label();

    TextField xCoordinate = new TextField("234");
    TextField yCoordinate = new TextField("200");
    Button moveShipButton = new Button("Rotate ship");

    Ship myShip = new Ship();

    public TheExpanse(int fps, String title) {
        super(fps, title);
    }

    /**
     * Initialize the game world by adding sprite objects.
     *
     * @param primaryStage The game window or primary stage.
     */
    @Override
    public void initialize(final Stage primaryStage) {
        // Sets the window title
        primaryStage.setTitle(getWindowTitle());
        //primaryStage.setFullScreen(true);

        // Create the scene
        setSceneNodes(new Group());
        setGameSurface(new Scene(getSceneNodes(), 800, 600));
        getGameSurface().setFill(Color.BLACK);
        primaryStage.setScene(getGameSurface());
        // Setup Game input
        setupInput(primaryStage);

        // Create many spheres
        generateManySpheres(2);

        // Display the number of spheres visible.
        // Create a button to add more spheres.
        // Create a button to freeze the game loop.
        //final Timeline gameLoop = getGameLoop();
        getSpriteManager().addSprites(myShip);
        getSceneNodes().getChildren().add(myShip.node);

        // mouse point
        VBox stats = new VBox();

        HBox row1 = new HBox();
        mousePtLabel.setTextFill(Color.WHITE);
        row1.getChildren().add(mousePtLabel);
        HBox row2 = new HBox();
        mousePressPtLabel.setTextFill(Color.WHITE);
        row2.getChildren().add(mousePressPtLabel);

        stats.getChildren().add(row1);
        stats.getChildren().add(row2);

        // mouse point
        HBox enterCoord1 = new HBox();
        enterCoord1.getChildren().add(xCoordinate);
        enterCoord1.getChildren().add(yCoordinate);
        enterCoord1.getChildren().add(moveShipButton);
        stats.getChildren().add(enterCoord1);
        moveShipButton.setOnAction(new EventHandler() {
            @Override
            public void handle(ActionEvent actionEvent) {
                double x = Double.parseDouble(xCoordinate.getText());
                double y = Double.parseDouble(yCoordinate.getText());
                myShip.plotCourse(x, y, false);
            }
        });

        // ===================================================
        // Debugging purposes
        // uncomment to test mouse press and rotation angles.
        //getSceneNodes().getChildren().add(stats);
    }

    /**
     * Sets up the mouse input.
     *
     * @param primaryStage The primary stage (app window).
     */
    private void setupInput(Stage primaryStage) {
        System.out.println("Ship's center is (" + myShip.getCenterX() + ", " + myShip.getCenterY() + ")");

        EventHandler fireOrMove = new EventHandler() {
            @Override
            public void handle(MouseEvent event) {
                mousePressPtLabel.setText("Mouse Press PT = (" + event.getX() + ", " + event.getY() + ")");
                if (event.getButton() == MouseButton.PRIMARY) {
                    // Aim
                    myShip.plotCourse(event.getX(), event.getY(), false);
                    // fire
                    Missile m1 = myShip.fire();
                    getSpriteManager().addSprites(m1);
                    getSceneNodes().getChildren().add(0, m1.node);
                } else if (event.getButton() == MouseButton.SECONDARY) {
                    // determine when all atoms are not on the game surface. Ship should be one sprite left.
                    if (getSpriteManager().getAllSprites().size()                         generateManySpheres(30);
                    }

                    // stop ship from moving forward
                    myShip.applyTheBrakes(event.getX(), event.getY());
                    // move forward and rotate ship
                    myShip.plotCourse(event.getX(), event.getY(), true);
                }

            }
        };

        // Initialize input
        primaryStage.getScene().setOnMousePressed(fireOrMove);
        //addEventHandler(MouseEvent.MOUSE_PRESSED, me);

        // set up stats
        EventHandler changeWeapons = new EventHandler() {
            @Override
            public void handle(KeyEvent event) {
                myShip.changeWeapon(event.getCode());
            }
        };
        primaryStage.getScene().setOnKeyPressed(changeWeapons);

        // set up stats
        EventHandler showMouseMove = new EventHandler() {
            @Override
            public void handle(MouseEvent event) {
                mousePtLabel.setText("Mouse PT = (" + event.getX() + ", " + event.getY() + ")");
            }
        };

        primaryStage.getScene().setOnMouseMoved(showMouseMove);
    }

    /**
     * Make some more space spheres (Atomic particles)
     *
     * @param numSpheres The number of random sized, color, and velocity atoms to generate.
     */
    private void generateManySpheres(int numSpheres) {
        Random rnd = new Random();
        Scene gameSurface = getGameSurface();
        for (int i = 0; i < numSpheres; i++) {             Color c = Color.rgb(rnd.nextInt(255), rnd.nextInt(255), rnd.nextInt(255));             Atom b = new Atom(rnd.nextInt(15) + 5, c, true);             Circle circle = b.getAsCircle();             // random 0 to 2 + (.0 to 1) * random (1 or -1)             b.vX = (rnd.nextInt(2) + rnd.nextDouble()) * (rnd.nextBoolean() ? 1 : -1);             b.vY = (rnd.nextInt(2) + rnd.nextDouble()) * (rnd.nextBoolean() ? 1 : -1);             // random x between 0 to width of scene             double newX = rnd.nextInt((int) gameSurface.getWidth());             // check for the right of the width newX is greater than width              // minus radius times 2(width of sprite)             if (newX > (gameSurface.getWidth() - (circle.getRadius() * 2))) {
                newX = gameSurface.getWidth() - (circle.getRadius() * 2);
            }

            // check for the bottom of screen the height newY is greater than height
            // minus radius times 2(height of sprite)
            double newY = rnd.nextInt((int) gameSurface.getHeight());
            if (newY > (gameSurface.getHeight() - (circle.getRadius() * 2))) {
                newY = gameSurface.getHeight() - (circle.getRadius() * 2);
            }

            circle.setTranslateX(newX);
            circle.setTranslateY(newY);
            circle.setVisible(true);
            circle.setId(b.toString());
            circle.setCache(true);
            circle.setCacheHint(CacheHint.SPEED);
            circle.setManaged(false);
            // add to actors in play (sprite objects)
            getSpriteManager().addSprites(b);

            // add sprite's
            getSceneNodes().getChildren().add(0, b.node);

        }
    }

    /**
     * Each sprite will update it's velocity and bounce off wall borders.
     *
     * @param sprite - An atomic particle (a sphere).
     */
    @Override
    protected void handleUpdate(Sprite sprite) {
        // advance object
        sprite.update();
        if (sprite instanceof Missile) {
            removeMissiles((Missile) sprite);
        } else {
            bounceOffWalls(sprite);
        }
    }

    /**
     * Change the direction of the moving object when it encounters the walls.
     *
     * @param sprite The sprite to update based on the wall boundaries.
     *               TODO The ship has got issues.
     */
    private void bounceOffWalls(Sprite sprite) {
        // bounce off the walls when outside of boundaries

        Node displayNode;
        if (sprite instanceof Ship) {
            displayNode = sprite.node;//((Ship)sprite).getCurrentShipImage();
        } else {
            displayNode = sprite.node;
        }
        // Get the group node's X and Y but use the ImageView to obtain the width.
        if (sprite.node.getTranslateX() > (getGameSurface().getWidth() - displayNode.getBoundsInParent().getWidth()) ||
                displayNode.getTranslateX() < 0) {             // bounce the opposite direction             sprite.vX = sprite.vX * -1;         }         // Get the group node's X and Y but use the ImageView to obtain the height.         if (sprite.node.getTranslateY() > getGameSurface().getHeight() - displayNode.getBoundsInParent().getHeight() ||
                sprite.node.getTranslateY() < 0) {             sprite.vY = sprite.vY * -1;         }     }     /**      * Remove missiles when they reach the wall boundaries.      *      * @param missile The missile to remove based on the wall boundaries.      */     private void removeMissiles(Missile missile) {         // bounce off the walls when outside of boundaries         if (missile.node.getTranslateX() > (getGameSurface().getWidth() -
                missile.node.getBoundsInParent().getWidth()) ||
                missile.node.getTranslateX() < 0) {             getSpriteManager().addSpritesToBeRemoved(missile);             getSceneNodes().getChildren().remove(missile.node);         }         if (missile.node.getTranslateY() > getGameSurface().getHeight() -
                missile.node.getBoundsInParent().getHeight() ||
                missile.node.getTranslateY() < 0) {

            getSpriteManager().addSpritesToBeRemoved(missile);
            getSceneNodes().getChildren().remove(missile.node);
        }
    }

    /**
     * How to handle the collision of two sprite objects. Stops the particle
     * by zeroing out the velocity if a collision occurred.
     *
     * @param spriteA Sprite from the first list.
     * @param spriteB Sprite from the second list.
     * @return boolean returns a true if the two sprites have collided otherwise false.
     */
    @Override
    protected boolean handleCollision(Sprite spriteA, Sprite spriteB) {
        if (spriteA != spriteB) {
            if (spriteA.collide(spriteB)) {
                if (spriteA instanceof Atom && spriteB instanceof Atom) {

                    ((Atom) spriteA).implode(this); // will remove from the Scene onFinish()
                    ((Atom) spriteB).implode(this);
                    getSpriteManager().addSpritesToBeRemoved(spriteA, spriteB);

                    return true;
                }
            }
        }

        return false;
    }

}

Ship

The Ship class represents our cool looking spaceship. The Ship class inherits from the Sprite class to help us contain velocity information (vector). This class will also contain a doubly linked list containing 32 ImageView (RotatedShipImage) instances which represent each direction to simulate the ship rotating about its center (centroid). At some point I want to change this by making a single SVGPath object to be rotated (I know there are trade offs). For this tutorial I implemented the ship by taking ImageViews objects to be rotated 32 direction evenly from 0 to 360 degrees. Shown below in Figure 3 are all 32 directions using 32 ImageView instances and a single Image object of the image of a spaceship to simulate the rotation about its center (pivot point).

Figure 3: 32 Directions to simulate a rotation

When animating the ship rotating I simply set all but the current image visible using the setVisible(true) method on the ImageView node.

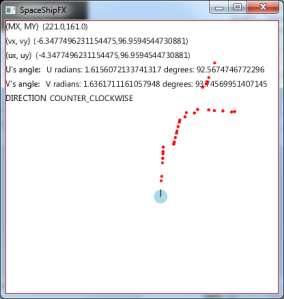
Disclaimer: In gaming you will inevitably encounter math (Trigonometry). If you are interested and want to dig deeper please look at the source code of the TheExpanse class’ initialize() method. At the end of the method uncomment the statement: getSceneNodes().getChildren().add(stats);  . This will display controls which will allow you to use to debug and inspect mouse press coordinates. Also, you can see output in your console (stdout) relating to angles, vectors, etc.

The Ship’s member variables:

  • turnDirection – enum DIRECTION with Clockwise, CounterClockwise, and Neither
  • u – Vec object which contains a vector in relation to the center of the ship coordinates denoting the starting direction the ship begins to rotate
  • directionalShips – list of RotatedShipImage objects each having a previous and next reference to other RotatedShipImage objects. Zero degrees (uIndex=0) is when the spaceship facing east. When rotating a JavaFX nodes going in a counter clockwise direction is positive numbers in degrees
  • uIndex – index of the current RotatedShipImage in the directionalShips list that is to be displayed
  • vIndex – index of the RotatedShipImage in the directionalShips list that is to be displayed at the end of the rotation animation
  • stopArea – a JavaFX Circle with a radius for the ship to know when to stop the ship from moving
  • flipBook – A JavaFX Group containing all RotatedShipImage objects (32). The group is rendered on the Scene. Like a flip book in animation each RotatedShipImage will be determined to be displayed based on uIndex and vIndex
  • keyCode – a JavaFX KeyCode will help determine if a key press to help change your weapon (character ‘2’)

The Ship’s member functions:

  • update() – Updates the ships velocity and direction. Also will determine when to stop moving.
  • getCurrentShipImage() – Based on the uIndex it returns the ImageView that is the current ship direction image that is being displayed
  • getCenterX() – returns the screen’s X coordinate of the center of the ship
  • getCenterY() – returns the screen’s X coordinate of the center of the ship
  • plotCourse(double screenX, double screenY, boolean thrust) – After the user clicks their mouse on the screen this method will calculate the angle to rotate the ship and change the velocity to thrust toward the coordinates onto the destination point. When using the Vec object the screen coordinates will be converted to Cartesian coordinates for determining the angle between two vectors (U and V).
  • turnShip() – The plotCourse() method calls turnShip() method to perform the actual animation of the rotation of the ship
  • applyTheBrakes(double screenX, double screenY) – After the user has chosen (right mouse click) where the ship will navigate to applyTheBrakes() method simply sets up the stopArea (Circle) object to let the ship know when to stop
  • fire() – Returns a Missile (Sprite) object for the game engine to put into the scene. Each missile contains the same direction of the ship with a scaled up velocity (increase speed). Should be faster than the ship can fly.
  •  changeWeapon(KeyCode keyCode) – After the user (player) hit the key stroke of a ‘2’ the weapon will change to create a larger missile projectile but slightly slower. Any other key press will be the default weapon that creates small missile projectiles which are faster moving.
Shown below is figure 4 of a class diagram displaying the members of the class Ship.

Ship Class Diagram

Figure 4: Ship class diagram

Shown below is the source code of the Ship class. Click to expand.

package carlfx.demos.navigateship;

import carlfx.gameengine.Sprite;
import javafx.animation.KeyFrame;
import javafx.animation.Timeline;
import javafx.animation.TimelineBuilder;
import javafx.event.ActionEvent;
import javafx.event.EventHandler;
import javafx.scene.CacheHint;
import javafx.scene.Group;
import javafx.scene.Node;
import javafx.scene.image.Image;
import javafx.scene.input.KeyCode;
import javafx.scene.paint.Color;
import javafx.scene.shape.Circle;
import javafx.util.Duration;
import java.util.ArrayList;
import java.util.List;

/**
 * A space ship with 32 directions
 * When two atoms collide each will fade and become removed from the scene. The
 * method called implode() implements a fade transition effect.
 *
 * @author cdea
 */
public class Ship extends Sprite {

    /**
     * 360 degree turn
     */
    private final static int TWO_PI_DEGREES = 360;

    /**
     * Number of ship frames and directions the ship is pointing nose
     */
    private final static int NUM_DIRECTIONS = 32;

    /**
     * The angle of one direction (adjacent directions) (11.25 degrees)
     */
    private final static float UNIT_ANGLE_PER_FRAME = ((float) TWO_PI_DEGREES / NUM_DIRECTIONS);

    /**
     * Amount of time it takes the ship to move 180 degrees in milliseconds.
     */
    private final static int MILLIS_TURN_SHIP_180_DEGREES = 300;

    /**
     * When the ship turns on each direction one amount of time for one frame or turn of the ship. (18.75 milliseconds)
     */
    private final static float MILLIS_PER_FRAME = (float) MILLIS_TURN_SHIP_180_DEGREES / (NUM_DIRECTIONS / 2);

    /**
     * All possible turn directions Clockwise, Counter Clockwise, or Neither when the user clicks mouse around ship
     */
    private enum DIRECTION {
        CLOCKWISE, COUNTER_CLOCKWISE, NEITHER
    }

    /**
     * Velocity amount used vector when ship moves forward. scale vector of ship. See flipBook translateX and Y.
     */
    private final static float THRUST_AMOUNT = 3.3f;

    /***/
    private final static float MISSILE_THRUST_AMOUNT = 6.3F;

    /**
     * Angle in degrees to rotate ship.
     */

    /**
     * Current turning direction. default is NEITHER. Clockwise and Counter Clockwise.
     */
    private DIRECTION turnDirection = DIRECTION.NEITHER;

    /**
     * The current starting position of the vector or coordinate where the nose of the ship is pointing towards.
     */
    private Vec u; // current or start vector

    /**
     * All ImageViews of all the possible image frames for each direction the ship is pointing. ie: 32 directions.
     */
    private final List directionalShips = new ArrayList<>();

    /**
     * The Timeline instance to animate the ship rotating using images. This is an optical illusion similar to page
     * flipping as each frame is displayed the previous visible attribute is set to false. No rotation is happening.
     */
    private Timeline rotateShipTimeline;

    /**
     * The current index into the list of ImageViews representing each direction of the ship. Zero is the ship
     * pointing to the right or zero degrees.
     */
    private int uIndex = 0;

    /**
     * The end index into the list of ImageViews representing each direction of the ship. Zero is the ship
     * pointing to the right or zero degrees.
     */
    private int vIndex = 0;

    /**
     * The spot where the user has right clicked letting the engine check the ship's center is in this area.
     */
    private final Circle stopArea = new Circle();

    /**
     * A group contain all of the ship image view nodes.
     */
    private final Group flipBook = new Group();

    /**
     * A key code will be used for weapon selection.
     */
    private KeyCode keyCode;

    public Ship() {

        // Load one image.
        Image shipImage = new Image(getClass().getClassLoader().getResource("ship.png").toExternalForm(), true);
        stopArea.setRadius(40);
        RotatedShipImage prev = null;

        // create all the number of directions based on a unit angle. 360 divided by NUM_DIRECTIONS
        for (int i = 0; i < NUM_DIRECTIONS; i++) {
            RotatedShipImage imageView = new RotatedShipImage();
            imageView.setImage(shipImage);
            imageView.setRotate(-1 * i * UNIT_ANGLE_PER_FRAME);
            imageView.setCache(true);
            imageView.setCacheHint(CacheHint.SPEED);
            imageView.setManaged(false);
            imageView.prev = prev;
            imageView.setVisible(false);
            directionalShips.add(imageView);
            if (prev != null) {
                prev.next = imageView;
            }
            prev = imageView;
            flipBook.getChildren().add(imageView);
        }
        RotatedShipImage firstShip = directionalShips.get(0);
        firstShip.prev = prev;
        prev.next = firstShip;
        // set javafx node to an image
        firstShip.setVisible(true);
        node = flipBook;
        flipBook.setTranslateX(200);
        flipBook.setTranslateY(300);

    }

    /**
     * Change the velocity of the atom particle.
     */
    @Override
    public void update() {
        flipBook.setTranslateX(flipBook.getTranslateX() + vX);
        flipBook.setTranslateY(flipBook.getTranslateY() + vY);

        if (stopArea.contains(getCenterX(), getCenterY())) {
            vX = 0;
            vY = 0;
        }

    }

    private RotatedShipImage getCurrentShipImage() {
        return directionalShips.get(uIndex);
    }

    /**
     * The center X coordinate of the current visible image. See <code>getCurrentShipImage()</code> method.
     *
     * @return The scene or screen X coordinate.
     */
    public double getCenterX() {
        RotatedShipImage shipImage = getCurrentShipImage();
        return node.getTranslateX() + (shipImage.getBoundsInLocal().getWidth() / 2);
    }

    /**
     * The center Y coordinate of the current visible image. See <code>getCurrentShipImage()</code> method.
     *
     * @return The scene or screen Y coordinate.
     */
    public double getCenterY() {
        RotatedShipImage shipImage = getCurrentShipImage();
        return node.getTranslateY() + (shipImage.getBoundsInLocal().getHeight() / 2);
    }

    /**
     * Determines the angle between it's starting position and ending position (Similar to a clock's second hand).
     * When the user is shooting the ship nose will point in the direction of the mouse press using the primary button.
     * When the user is thrusting to a location on the screen the right click mouse will pass true to the thrust
     * parameter.
     *
     * @param screenX The mouse press' screen x coordinate.
     * @param screenY The mouse press' screen ycoordinate.
     * @param thrust  Thrust ship forward or not. True move forward otherwise false.
     */
    public void plotCourse(double screenX, double screenY, boolean thrust) {
        // get center of ship
        double sx = getCenterX();
        double sy = getCenterY();

        // get user's new turn position based on mouse click
        Vec v = new Vec(screenX, screenY, sx, sy);
        if (u == null) {
            u = new Vec(1, 0);
        }

        double atan2RadiansU = Math.atan2(u.y, u.x);
        double atan2DegreesU = Math.toDegrees(atan2RadiansU);

        double atan2RadiansV = Math.atan2(v.y, v.x);
        double atan2DegreesV = Math.toDegrees(atan2RadiansV);

        double angleBetweenUAndV = atan2DegreesV - atan2DegreesU;

        // if abs value is greater than 180 move counter clockwise
        //(or opposite of what is determined)
        double absAngleBetweenUAndV = Math.abs(angleBetweenUAndV);
        boolean goOtherWay = false;
        if (absAngleBetweenUAndV > 180) {
            if (angleBetweenUAndV < 0) {                 turnDirection = DIRECTION.COUNTER_CLOCKWISE;                 goOtherWay = true;             } else if (angleBetweenUAndV > 0) {
                turnDirection = DIRECTION.CLOCKWISE;
                goOtherWay = true;
            } else {
                turnDirection = Ship.DIRECTION.NEITHER;
            }
        } else {
            if (angleBetweenUAndV < 0) {                 turnDirection = Ship.DIRECTION.CLOCKWISE;             } else if (angleBetweenUAndV > 0) {
                turnDirection = Ship.DIRECTION.COUNTER_CLOCKWISE;
            } else {
                turnDirection = Ship.DIRECTION.NEITHER;
            }
        }

        double degreesToMove = absAngleBetweenUAndV;
        if (goOtherWay) {
            degreesToMove = TWO_PI_DEGREES - absAngleBetweenUAndV;
        }

        //int q = v.quadrant();

        uIndex = Math.round((float) (atan2DegreesU / UNIT_ANGLE_PER_FRAME));
        if (uIndex < 0) {
            uIndex = NUM_DIRECTIONS + uIndex;
        }
        vIndex = Math.round((float) (atan2DegreesV / UNIT_ANGLE_PER_FRAME));
        if (vIndex < 0) {             vIndex = NUM_DIRECTIONS + vIndex;         }         String debugMsg = turnDirection +                 " U [m(" + u.mx + ", " + u.my + ")  => c(" + u.x + ", " + u.y + ")] " +
                " V [m(" + v.mx + ", " + v.my + ")  => c(" + v.x + ", " + v.y + ")] " +
                " start angle: " + atan2DegreesU +
                " end angle:" + atan2DegreesV +
                " Angle between: " + degreesToMove +
                " Start index: " + uIndex +
                " End index: " + vIndex;

        System.out.println(debugMsg);

        if (thrust) {
            vX = Math.cos(atan2RadiansV) * THRUST_AMOUNT;
            vY = -Math.sin(atan2RadiansV) * THRUST_AMOUNT;
        }
        turnShip();

        u = v;
    }

    private void turnShip() {

        final Duration oneFrameAmt = Duration.millis(MILLIS_PER_FRAME);
        RotatedShipImage startImage = directionalShips.get(uIndex);
        RotatedShipImage endImage = directionalShips.get(vIndex);
        List frames = new ArrayList<>();

        RotatedShipImage currImage = startImage;

        int i = 1;
        while (true) {

            final Node displayNode = currImage;

            KeyFrame oneFrame = new KeyFrame(oneFrameAmt.multiply(i),
                    new EventHandler() {

                        @Override
                        public void handle(javafx.event.ActionEvent event) {
                            // make all ship images invisible
                            for (RotatedShipImage shipImg : directionalShips) {
                                shipImg.setVisible(false);
                            }
                            // make current ship image visible
                            displayNode.setVisible(true);

                            // update the current index
                            //uIndex = directionalShips.indexOf(displayNode);
                        }
                    }); // oneFrame

            frames.add(oneFrame);

            if (currImage == endImage) {
                break;
            }
            if (turnDirection == DIRECTION.CLOCKWISE) {
                currImage = currImage.prev;
            }
            if (turnDirection == DIRECTION.COUNTER_CLOCKWISE) {
                currImage = currImage.next;
            }
            i++;
        }

        if (rotateShipTimeline != null) {
            rotateShipTimeline.stop();
            rotateShipTimeline.getKeyFrames().clear();
            rotateShipTimeline.getKeyFrames().addAll(frames);
        } else {
            // sets the game world's game loop (Timeline)
            rotateShipTimeline = TimelineBuilder.create()
                    .keyFrames(frames)
                    .build();

        }

        rotateShipTimeline.playFromStart();

    }

    /**
     * Stops the ship from thrusting forward.
     *
     * @param screenX the screen's X coordinate to stop the ship.
     * @param screenY the screen's Y coordinate to stop the ship.
     */
    public void applyTheBrakes(double screenX, double screenY) {
        stopArea.setCenterX(screenX);
        stopArea.setCenterY(screenY);
    }

    public Missile fire() {
        Missile m1;

        float slowDownAmt = 0;
        if (KeyCode.DIGIT2 == keyCode) {
            m1 = new Missile(10, Color.BLUE);
            slowDownAmt = 2.3f;
        } else {
            m1 = new Missile(Color.RED);
        }
        // velocity vector of the missile
        m1.vX = Math.cos(Math.toRadians(uIndex * UNIT_ANGLE_PER_FRAME)) * (MISSILE_THRUST_AMOUNT - slowDownAmt);
        m1.vY = -Math.sin(Math.toRadians(uIndex * UNIT_ANGLE_PER_FRAME)) * (MISSILE_THRUST_AMOUNT - slowDownAmt);

        // make the missile launch in the direction of the current direction of the ship nose. based on the
        // current frame (uIndex) into the list of image view nodes.
        RotatedShipImage shipImage = directionalShips.get(uIndex);

        // start to appear in the center of the ship to come out the direction of the nose of the ship.
        double offsetX = (shipImage.getBoundsInLocal().getWidth() - m1.node.getBoundsInLocal().getWidth()) / 2;
        double offsetY = (shipImage.getBoundsInLocal().getHeight() - m1.node.getBoundsInLocal().getHeight()) / 2;

        // initial launch of the missile
        m1.node.setTranslateX(node.getTranslateX() + offsetX + m1.vX);
        m1.node.setTranslateY(node.getTranslateY() + offsetY + m1.vY);
        return m1;
    }

    public void changeWeapon(KeyCode keyCode) {
        this.keyCode = keyCode;
    }

}

Vec

The Vec class is a simple helper container class to assist in holding a mouse click’s screen coordinates and converting them to Cartesian coordinates based on the center of a sprite, image, or shape. This class is used to help determine the angle between two vectors [Math.atan2(y,x)]. By determining the angle the ship is able to perform the rotation animation of the sprite image.

Shown below is the source code of the Vec class. Click to expand.

package carlfx.demos.navigateship;

/**
 * This class represents a container class to hold a Vector in space and direction
 * the ship will move. Assuming the center of the ship is the origin the angles can
 * be determined by a unit circle via Cartesian coordinates.
 * When the user clicks on the screen the mouse coordinates or screen coordinates
 * will be stored into the mx and my instance variables.
 * The x and y data members are converted to cartesian coordinates before storing.
 *
 * I purposefully left out getters and setters. In gaming just keep things minimalistic.
 * @author cdea
 */
public class Vec {
    public double mx;
    public double my;

    public double x;
    public double y;

    /**
     * This is a default constructor which will take a Cartesian coordinate.
     * @param x  X coordinate of a point on a Cartesian system.
     * @param y  Y coordinate of a point on a Cartesian system.
     */
    public Vec(float x, float y) {
        this.x = x;
        this.y = y;
    }

    /**
     * Constructor will convert mouse click points into Cartesian coordinates based on the sprite's center point as
     * the origin.
     * @param mx  Mouse press' screen X coordinate.
     * @param my  Mouse press' screen Y coordinate.
     * @param centerX Screen X coordinate of the center of the ship sprite.
     * @param centerY Screen Y coordinate of the center of the ship sprite.
     */
    public Vec(double mx, double my, double centerX, double centerY) {
        this.x = convertX(mx, centerX);
        this.y = convertY(my, centerY);
        this.mx = mx;
        this.my = my;
    }

    /**
     * Returns a Cartesian coordinate system's quadrant from 1 to 4.
*
     *     first quadrant - 1 upper right
     *     second quadrant - 2 upper left
     *     third quadrant - 3 lower left
     *     fourth quadrant - 4 lower right
     *
     * @return int quadrant number 1 through 4
     */
    public int quadrant() {
        int q = 0;
        if (x > 0 && y > 0) {
            q =1;
        } else if (x < 0 && y > 0) {
            q = 2;
        } else if (x < 0 && y < 0) {             q = 3;         } else if (x > 0 && y < 0) {
            q = 4;
        }
        return q;
    }
    @Override
    public String toString(){
        return "(" + x + "," + y + ") quadrant=" + quadrant();
    }
    /**
     * Converts point's X screen coordinate into a Cartesian system.
     * @param mouseX Converts the mouse X coordinate into Cartesian system based on the ship center X (originX).
     * @param originX The ship center point's X coordinate.
     * @return  double value of a Cartesian system X coordinate based on the origin X.
     */
    static double convertX(double mouseX, double originX) {
        return mouseX - originX;
    }

    /**
     * Converts point's Y screen coordinate into a Cartesian system.
     * @param mouseY  Converts the mouse Y coordinate into Cartesian system based on the ship center Y (originY).
     * @param originY The ship center point's Y coordinate.
     * @return  double value of a Cartesian system Y coordinate based on the origin Y.
     */
    static double convertY(double mouseY, double originY) {
        return originY - mouseY;
    }

}

RotatedShipImage

A RotatedShipImage class inherits from a JavaFX’s ImageView class, but also contains references to a previous and a next RotatedShipImage instances making up a doubly linked list. Figure 3 depicts 32 images of the of the “ship.png” rendered in each RotatedShipImage which are all placed in a JavaFX Group node. When the ship appears to rotate, one image is displayed at a time.

Shown below is the source code of the RotatedShipImage class. Click to expand.

package carlfx.demos.navigateship;

import javafx.scene.image.ImageView;

/**
 * Represents a double link list to assist in the rotation of the ship.
 * This helps to move clockwise and counter clockwise.
 */
public class RotatedShipImage extends ImageView {
    public RotatedShipImage next;
    public RotatedShipImage prev;
}

Missile

The Missile class inherits from the Atom class. The Missile acts as a marker class to differentiate between spheres (asteroids) and missiles. When missiles are created, they will contain the same direction of the ship (where the ship’s nose is pointing) with a larger velocity.

Shown below is the source code of the Missile class. Click to expand.

package carlfx.demos.navigateship;

import javafx.scene.paint.Color;

/**
 * A missile projectile without the radial gradient.
 */
public class Missile extends Atom {
    public Missile(Color fill) {
        super(5, fill, false);
    }

    public Missile(int radius, Color fill) {
        super(radius, fill, true);
    }
}

Conclusion

Input is so vital to any game play that it is often hard to get right. Older game engines will poll during a game loop. When using JavaFX 2.x’s event handling, you  implement the type of event to be added to the scene graph or to an individual Node object. Hopefully in the future, we will see more ingenious input devices used in gaming (see Oracle’s Java Technology Evangelist Simon Ritter).  Keep your eyes open for Part 4 which deals with collision detection. So, stay tuned and feel free to comment.

References:

7-Eleven: http://www.7-eleven.com

Playing Asteroids: http://www.play.vg/games/4-Asteroids.html

Asteroids: http://en.wikipedia.org/wiki/Asteroids_(video_game)

Scott Safran: http://en.wikipedia.org/wiki/Scott_Safran

Arcade in Backyard: http://www.themysteryworld.com/2011/02/guy-builds-video-arcade-in-his-back.html

StarWars downsized: http://techland.time.com/2012/04/26/man-builds-16-scale-star-wars-arcade-game/

Trigonometry: http://en.wikipedia.org/wiki/Trigonometry

JavaFX Node API: http://docs.oracle.com/javafx/2/api/javafx/scene/Node.html

JavaFX Scene API: http://docs.oracle.com/javafx/2/api/javafx/scene/Scene.html

JavaFX SVGPath API: http://docs.oracle.com/javafx/2/api/javafx/scene/shape/SVGPath.html

Multi-Touch and Gestures Support: http://www.oracle.com/technetwork/java/javafx/overview/roadmap-1446331.html

Pro JavaFX 2 Apress publishing – pg. 62 chapter 2 section on “Handling Input Events” . http://www.apress.com/9781430268727

Java 7 Recipes Apress publishing- pg. 602 chapter 16 Recipe 16-3 “Animating Shapes Along a Path”. http://www.apress.com/9781430240563

Video Game arcade cabinet: http://en.wikipedia.org/wiki/Video_game_arcade_cabinet

Raster Graphics: http://en.wikipedia.org/wiki/Raster_graphics

Part 3 source code at the GitHub: https://github.com/carldea/JFXGen/tree/master/demos/navigateship

JavaFX Canvas Node: http://mail.openjdk.java.net/pipermail/openjfx-dev/2012-April/001210.html

JavaFX- Optimizing Performance for JavaFX Applications: http://www.parleys.com/#st=5&id=2738&sl=0

Oracle’s Java Technology Evangelist Simon Ritter: https://blogs.oracle.com/javaone/entry/interfacing_with_the_interface_javafx

Video Game High School episode 1: http://www.rocketjump.com/?video=vghs-episode-1

Video Game High School episode 2: http://www.rocketjump.com/?video=vghs-episode-2-5

JavaFX 2 GameTutorial Part 2

UPDATE: Link to the source code is at the end of the blog.

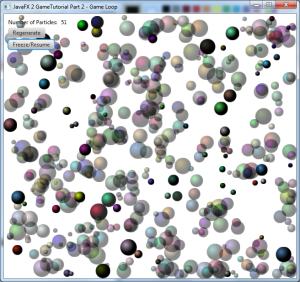
Demo of a JavaFX 2 game tutorial

Atom Smasher – Game Loop Demo.

 Introduction

This is the second installment of a series of blog entries relating to a JavaFX 2 Game Tutorial. If you have not read Part 1 please see the introduction section of the JavaFX 2 Game Tutorial. To recap in Part 1, I mention some aspects of game play and a simple demo of a prototype spaceship (comprised of simple shapes) that is capable of navigating via the mouse. Disclaimer: This is a long tutorial so if you just want to run the demo just Click HERE. The demo is called Atom Smasher where you generate atoms (spheres) that collide. You may freeze the game to add more atoms. The objective is to have more than one atom alive and bouncing around. A text displays the current number of atoms floating around. Before beginning our discussion on a game loop I wanted to give you some background history about games and animation.

History

Back in the day (during the 80s-90s) many game programmers attempted to animate images has encountered the infamous screen flicker problem. This is where your sprites (graphic images) will often flash and make the game look quite awful. All monitors have a refresh rate where certain intervals the pixels will be redrawn (called vertical retrace CRTs). For example, if the refresh rate is 80 Hz it is approximately 80 times a second the screen is redrawn. If you are modifying things on the screen you can often be out of sync because of being in the middle of a refresh interval. What should you do about this? Well, actually there are two things that will help remedy this problem (double buffering & knowing when the cycle is occurring). Some clever developers created a technique called double buffering. Double buffering is a technique which consists of two surfaces where each takes turns on becoming the displayable surface and the other is an offscreen area (buffer surface). This technique is really a digital sleight of hand trick where the developer can pre calculate the sprites and their positions to be drawn on the offscreen surface. Once you are finished drawing on the offscreen buffer the code will switch it as the displayable surface. An important thing to point out is that we still have an issue due to the fact that we need to be notified when the refresh interval is about to begin the redraw process. In Java this ability is built in via the BufferStrategy API. So, where am I going with this? Sometimes explaining the past strategies will help us appreciate what we have today. Do we need to do this in JavaFX? Nope. Have no fear JavaFX is here! All of the issues that I’ve mentioned are all taken care of for us by using JavaFX’s Scene graph API. However, most games will still use the old fashion way of animating graphics and updating the game world called the ‘Game Loop’.

The Game Loop

Simply put the game loop is responsible for updating sprites (graphics), checking collision, and cleanup. Older game loops will check for key and mouse events as part of the loop. Since JavaFX abstracts events to allow the Scene or individual nodes to handle events the ability to listen to low level events aren’t necessary in our game loop. Shown below is a source code snippet of a typical game loop which will update sprites, check collisions, and cleanup sprites at each cycle. You will notice the Duration object from JavaFX 2.x which represents 60 divided by 1000 milliseconds or 60 frames per second(FPS). Each frame will call the handle() method of the JavaFX’s EventHandler interface in order to update the game world. Hypothetically, I’ve create three methods updateSprites(), checkCollisions(), and cleanupSprites() that will be invoked to handle sprites in the game.


   final Duration oneFrameAmt = Duration.millis(1000/60);
   final KeyFrame oneFrame = new KeyFrame(oneFrameAmt,
      new EventHandler() {

      @Override
      public void handle(javafx.event.ActionEvent event) {

         // update actors
         updateSprites();

         // check for collision
         checkCollisions();

         // removed dead things
         cleanupSprites();

      }
   }); // oneFrame

   // sets the game world's game loop (Timeline)
   TimelineBuilder.create()
      .cycleCount(Animation.INDEFINITE)
      .keyFrames(oneFrame)
      .build()
      .play();

The above code snippet is really all you need to create a simple game or animation. However, you may want to take things to the next level. You may want to create a game engine that can manage sprites and the state of the game world.

Game Engine

A game engine is a fancy name for a utility or library responsible for encapsulating the game world,  running the game loop, managing sprites, physics, etc. This is essentially a small game framework that allows you to extend or reuse so you don’t have to reinvent the wheel when creating a 2D game from scratch. To fast forward I created a UML class diagram of a design of a game engine.

Shown below is Figure 1 A JavaFX Game Engine Class diagram.

Figure 1. A JavaFX 2 Game Engine Design

In Figure 1 A JavaFX 2 Game Engine Design you will notice three classes a GameWorld, SpriteManager, and Sprite. The GameWorld class is responsible for initializing the game state, executing the game loop, updating sprites, handling sprite collisions, and cleaning up. Next is the SpriteManager class which in charge of managing sprites by adding, removing, and other house keeping for collisions. Lastly, is the Sprite class which is responsible for maintaining the state of an image (Actor). In a 2D world a sprite can contain the object’s velocity, rotation, scene node or image that eventually gets rendered at each cycle (key frame/frames per second).

Just a quick reminder on UML notation:

  • Plus symbol ‘+‘ denotes that a class member is public.
  • Minus symbol ‘‘ denotes that a class member is private
  • Hash symbol ‘#‘ denotes that a class member is protected.

GameWorld

Below is the source code implementation of the GameWorld class. Click to expand. Later you will see a class diagram depicting a simple demo game that will extend the GameWorld class (see AtomSmasher).

package carlfx.gameengine;

import javafx.animation.Animation;
import javafx.animation.KeyFrame;
import javafx.animation.Timeline;
import javafx.animation.TimelineBuilder;
import javafx.event.ActionEvent;
import javafx.event.EventHandler;
import javafx.scene.Group;
import javafx.scene.Scene;
import javafx.stage.Stage;
import javafx.util.Duration;

/**
 * This application demonstrates a JavaFX 2.x Game Loop.
 * Shown below are the methods which comprise of the fundamentals to a
 * simple game loop in JavaFX:
*
 *  <strong>initialize()</strong> - Initialize the game world.
 *  <strong>beginGameLoop()</strong> - Creates a JavaFX Timeline object containing the game life cycle.
 *  <strong>updateSprites()</strong> - Updates the sprite objects each period (per frame)
 *  <strong>checkCollisions()</strong> - Method will determine objects that collide with each other.
 *  <strong>cleanupSprites()</strong> - Any sprite objects needing to be removed from play.
 *
 * @author cdea
 */
public abstract class GameWorld {

    /** The JavaFX Scene as the game surface */
    private Scene gameSurface;
    /** All nodes to be displayed in the game window. */
    private Group sceneNodes;
    /** The game loop using JavaFX's <code>Timeline</code> API.*/
    private static Timeline gameLoop;

    /** Number of frames per second. */
    private final int framesPerSecond;

    /** Title in the application window.*/
    private final String windowTitle;

    /**
     * The sprite manager.
     */
    private final SpriteManager spriteManager = new SpriteManager();

    /**
     * Constructor that is called by the derived class. This will
     * set the frames per second, title, and setup the game loop.
     * @param fps - Frames per second.
     * @param title - Title of the application window.
     */
    public GameWorld(final int fps, final String title) {
        framesPerSecond = fps;
        windowTitle = title;
        // create and set timeline for the game loop
        buildAndSetGameLoop();
    }

    /**
     * Builds and sets the game loop ready to be started.
     */
    protected final void buildAndSetGameLoop() {

        final Duration oneFrameAmt = Duration.millis(1000/getFramesPerSecond());
        final KeyFrame oneFrame = new KeyFrame(oneFrameAmt,
            new EventHandler() {

                @Override
                public void handle(javafx.event.ActionEvent event) {

                    // update actors
                    updateSprites();

                    // check for collision
                    checkCollisions();

                    // removed dead things
                    cleanupSprites();

                }
        }); // oneFrame

        // sets the game world's game loop (Timeline)
        setGameLoop(TimelineBuilder.create()
                .cycleCount(Animation.INDEFINITE)
                .keyFrames(oneFrame)
                .build());
    }

    /**
     * Initialize the game world by update the JavaFX Stage.
     * @param primaryStage
     */
    public abstract void initialize(final Stage primaryStage);

    /**Kicks off (plays) the Timeline objects containing one key frame
     * that simply runs indefinitely with each frame invoking a method
     * to update sprite objects, check for collisions, and cleanup sprite
     * objects.
     *
     */
    public void beginGameLoop() {
        getGameLoop().play();
    }

    /**
     * Updates each game sprite in the game world. This method will
     * loop through each sprite and passing it to the handleUpdate()
     * method. The derived class should override handleUpdate() method.
     *
     */
    protected void updateSprites() {
        for (Sprite sprite:spriteManager.getAllSprites()){
            handleUpdate(sprite);
        }
    }

    /** Updates the sprite object's information to position on the game surface.
     * @param sprite - The sprite to update.
     */
    protected void handleUpdate(Sprite sprite) {
    }

    /**
     * Checks each game sprite in the game world to determine a collision
     * occurred. The method will loop through each sprite and
     * passing it to the handleCollision()
     * method. The derived class should override handleCollision() method.
     *
     */
    protected void checkCollisions() {
        // check other sprite's collisions
        spriteManager.resetCollisionsToCheck();
        // check each sprite against other sprite objects.
        for (Sprite spriteA:spriteManager.getCollisionsToCheck()){
            for (Sprite spriteB:spriteManager.getAllSprites()){
                if (handleCollision(spriteA, spriteB)) {
                    // The break helps optimize the collisions
                    //  The break statement means one object only hits another
                    // object as opposed to one hitting many objects.
                    // To be more accurate comment out the break statement.
                    break;
                }
            }
        }
    }

    /**
     * When two objects collide this method can handle the passed in sprite
     * objects. By default it returns false, meaning the objects do not
     * collide.
     * @param spriteA - called from checkCollision() method to be compared.
     * @param spriteB - called from checkCollision() method to be compared.
     * @return boolean True if the objects collided, otherwise false.
     */
    protected boolean handleCollision(Sprite spriteA, Sprite spriteB) {
        return false;
    }

    /**
     * Sprites to be cleaned up.
     */
    protected void cleanupSprites() {
        spriteManager.cleanupSprites();
    }

    /**
     * Returns the frames per second.
     * @return int The frames per second.
     */
    protected int getFramesPerSecond() {
        return framesPerSecond;
    }

    /**
     * Returns the game's window title.
     * @return String The game's window title.
     */
    public String getWindowTitle() {
        return windowTitle;
    }

    /**
     * The game loop (Timeline) which is used to update, check collisions, and
     * cleanup sprite objects at every interval (fps).
     * @return Timeline An animation running indefinitely representing the game
     * loop.
     */
    protected static Timeline getGameLoop() {
        return gameLoop;
    }

    /**
     * The sets the current game loop for this game world.
     * @param gameLoop Timeline object of an animation running indefinitely
     * representing the game loop.
     */
    protected static void setGameLoop(Timeline gameLoop) {
        GameWorld.gameLoop = gameLoop;
    }

    /**
     * Returns the sprite manager containing the sprite objects to
     * manipulate in the game.
     * @return SpriteManager The sprite manager.
     */
    protected SpriteManager getSpriteManager() {
        return spriteManager;
    }

    /**
     * Returns the JavaFX Scene. This is called the game surface to
     * allow the developer to add JavaFX Node objects onto the Scene.
     * @return
     */
    public Scene getGameSurface() {
        return gameSurface;
    }

    /**
     * Sets the JavaFX Scene. This is called the game surface to
     * allow the developer to add JavaFX Node objects onto the Scene.
     * @param gameSurface The main game surface (JavaFX Scene).
     */
    protected void setGameSurface(Scene gameSurface) {
        this.gameSurface = gameSurface;
    }

    /**
     * All JavaFX nodes which are rendered onto the game surface(Scene) is
     * a JavaFX Group object.
     * @return Group The root containing many child nodes to be displayed into
     * the Scene area.
     */
    public Group getSceneNodes() {
        return sceneNodes;
    }

    /**
     * Sets the JavaFX Group that will hold all JavaFX nodes which are rendered
     * onto the game surface(Scene) is a JavaFX Group object.
     * @param sceneNodes The root container having many children nodes
     * to be displayed into the Scene area.
     */
    protected void setSceneNodes(Group sceneNodes) {
        this.sceneNodes = sceneNodes;
    }

}

SpriteManager

A sprite manager class is a helper class to assist the game loop to keep track of sprites. Normally a sprite manager will contain all sprites and each sprite contains a JavaFX Node that is displayed onto the Scene graph.
Shown below is the source code. Click to expand.

package carlfx.gameengine;

import java.util.*;

/**
 * Sprite manager is responsible for holding all sprite objects, and cleaning up
 * sprite objects to be removed. All collections are used by the JavaFX
 * application thread. During each cycle (animation frame) sprite management
 * occurs. This assists the user of the API to not have to create lists to
 * later be garbage collected. Should provide some performance gain.
 * @author cdea
 */
public class SpriteManager {
    /** All the sprite objects currently in play */
    private final static List GAME_ACTORS = new ArrayList<>();

    /** A global single threaded list used to check collision against other
     * sprite objects.
     */
    private final static List CHECK_COLLISION_LIST = new ArrayList<>();

    /** A global single threaded set used to cleanup or remove sprite objects
     * in play.
     */
    private final static Set CLEAN_UP_SPRITES = new HashSet<>();

    /** */
    public List getAllSprites() {
        return GAME_ACTORS;
    }

    /**
     * VarArgs of sprite objects to be added to the game.
     * @param sprites
     */
    public void addSprites(Sprite... sprites) {
        GAME_ACTORS.addAll(Arrays.asList(sprites));
    }

    /**
     * VarArgs of sprite objects to be removed from the game.
     * @param sprites
     */
    public void removeSprites(Sprite... sprites) {
        GAME_ACTORS.removeAll(Arrays.asList(sprites));
    }

    /** Returns a set of sprite objects to be removed from the GAME_ACTORS.
     * @return CLEAN_UP_SPRITES
     */
    public Set getSpritesToBeRemoved() {
        return CLEAN_UP_SPRITES;
    }

 /**
     * Adds sprite objects to be removed
     * @param sprites varargs of sprite objects.
     */
    public void addSpritesToBeRemoved(Sprite... sprites) {
        if (sprites.length > 1) {
            CLEAN_UP_SPRITES.addAll(Arrays.asList((Sprite[]) sprites));
        } else {
            CLEAN_UP_SPRITES.add(sprites[0]);
        }
    }

    /**
     * Returns a list of sprite objects to assist in collision checks.
     * This is a temporary and is a copy of all current sprite objects
     * (copy of GAME_ACTORS).
     * @return CHECK_COLLISION_LIST
     */
    public List getCollisionsToCheck() {
        return CHECK_COLLISION_LIST;
    }

    /**
     * Clears the list of sprite objects in the collision check collection
     * (CHECK_COLLISION_LIST).
     */
    public void resetCollisionsToCheck() {
        CHECK_COLLISION_LIST.clear();
        CHECK_COLLISION_LIST.addAll(GAME_ACTORS);
    }

    /**
     * Removes sprite objects and nodes from all
     * temporary collections such as:
     * CLEAN_UP_SPRITES.
     * The sprite to be removed will also be removed from the
     * list of all sprite objects called (GAME_ACTORS).
     */
    public void cleanupSprites() {

        // remove from actors list
        GAME_ACTORS.removeAll(CLEAN_UP_SPRITES);

        // reset the clean up sprites
        CLEAN_UP_SPRITES.clear();
    }
}

Sprite

The Sprite class represents an image or node to be displayed onto the JavaFX Scene graph. In a 2D game a sprite will contain additional information such as its velocity for the object as it moves across the scene area. The game loop will call the update() and collide() method at every interval of a key frame.
Shown below is the source code. Click to expand.

package carlfx.gameengine;

import java.util.ArrayList;
import java.util.List;
import javafx.animation.Animation;
import javafx.scene.Node;

/**
 * The Sprite class represents a image or node to be displayed.
 * In a 2D game a sprite will contain a velocity for the image to
 * move across the scene area. The game loop will call the update()
 * and collide() method at every interval of a key frame. A list of
 * animations can be used during different situations in the game
 * such as rocket thrusters, walking, jumping, etc.
 * @author cdea
 */
public abstract class Sprite {

    /** Animation for the node */
    public List animations = new ArrayList<>();

    /** Current display node */
    public Node node;

    /** velocity vector x direction */
    public double vX = 0;

    /** velocity vector y direction */
    public double vY = 0;

    /** dead? */
    public boolean isDead = false;

    /**
     * Updates this sprite object's velocity, or animations.
     */
    public abstract void update();

    /**
     * Did this sprite collide into the other sprite?
     *
     * @param other - The other sprite.
     * @return
     */
    public boolean collide(Sprite other) {
        return false;
    }
}

JavaFX 2 Game Loop Demo – Atom Smasher

Whew! If you’ve got this far you are one brave soul. Let’s take a small break and try out the demo I created using the game engine above.
Shown below is a Java Webstart button to launch the game demo. Later, you will see the design and source code detailing how it was created.

Requirements:

  • Java 7 or later
  • JavaFX 2.0.2 2.1 or later
  • Windows XP or later (Should be available soon for Linux/MacOS)
AtomSmasher Game loop demo

Demo

GameLoopPart2 Design

Below is a class diagram of the game demo called Atom Smasher which uses the game engine framework mentioned earlier.
Shown below is Figure 2 Atom Smasher Class Diagram.

Figure 2. Atom Smasher Class Diagram

GameLoopPart2

The GameLoopPart2 is the driver or main JavaFX application that runs the game. This creates a GameWorld object to be initialized and starts the game loop.
Shown below is the source code. Click to expand.

package carlfx;

import carlfx.gameengine.GameWorld;
import javafx.application.Application;
import javafx.stage.Stage;

/**
 * The main driver of the game.
 * @author cdea
 */
public class GameLoopPart2 extends Application {

    GameWorld gameWorld = new AtomSmasher(60, "JavaFX 2 GameTutorial Part 2 - Game Loop");
    /**
     * @param args the command line arguments
     */
    public static void main(String[] args) {
        launch(args);
    }

    @Override
    public void start(Stage primaryStage) {
        // setup title, scene, stats, controls, and actors.
        gameWorld.initialize(primaryStage);

        // kick off the game loop
        gameWorld.beginGameLoop();

        // display window
        primaryStage.show();
    }

}

AtomSmasher

AtomSmasher is a derived class of the GameWorld class. It creates many spheres that animate with random velocities, colors and positions. Button controls lets the user generate more ‘atoms’ (JavaFX Circle nodes). As each atom collides with one another they will invoke the implode() method that produces a fade transition animation. You will notice how easy it is to implement this game by simply implementing initialize(), handleUpdate(), handleCollision(), and cleanupSprites() methods. Once implemented the game engine does the rest. The initialize() method creates the button controls for the user. To update the sprites positions or change the game state you will implement the handleUpdate() method. To compare all sprites if they have collided with one another you will implement the handleCollision(). The last part of the game loop’s life cycle is cleaning up sprites. Cleaning up means updating the sprite manger and updating the JavaFX Scene (removing nodes).
Shown below is the source code. Click to expand.

package carlfx;

import carlfx.gameengine.GameWorld;
import carlfx.gameengine.Sprite;
import java.util.Random;
import javafx.animation.Timeline;
import javafx.event.EventHandler;
import javafx.scene.Group;
import javafx.scene.Scene;
import javafx.scene.control.ButtonBuilder;
import javafx.scene.control.Label;
import javafx.scene.input.MouseEvent;
import javafx.scene.layout.HBoxBuilder;
import javafx.scene.layout.VBox;
import javafx.scene.layout.VBoxBuilder;
import javafx.scene.paint.Color;
import javafx.scene.shape.Circle;
import javafx.stage.Stage;
import static javafx.animation.Animation.Status.RUNNING;
import static javafx.animation.Animation.Status.STOPPED;

/**
 * This is a simple game world simulating a bunch of spheres looking
 * like atomic particles colliding with each other. When the game loop begins
 * the user will notice random spheres (atomic particles) floating and
 * colliding. The user is able to press a button to generate more
 * atomic particles. Also, the user can freeze the game.
 *
 * @author cdea
 */
public class AtomSmasher extends GameWorld {
    /** Read only field to show the number of sprite objects are on the field*/
    private final static Label NUM_SPRITES_FIELD = new Label();

    public AtomSmasher(int fps, String title){
        super(fps, title);
    }

    /**
     * Initialize the game world by adding sprite objects.
     * @param primaryStage
     */
    @Override
    public void initialize(final Stage primaryStage) {
        // Sets the window title
        primaryStage.setTitle(getWindowTitle());

        // Create the scene
        setSceneNodes(new Group());
        setGameSurface(new Scene(getSceneNodes(), 640, 580));
        primaryStage.setScene(getGameSurface());

        // Create many spheres
        generateManySpheres(150);

        // Display the number of spheres visible.
        // Create a button to add more spheres.
        // Create a button to freeze the game loop.
        final Timeline gameLoop = getGameLoop();
        VBox stats = VBoxBuilder.create()
            .spacing(5)
            .translateX(10)
            .translateY(10)
            .children(HBoxBuilder.create()
                .spacing(5)
                .children(new Label("Number of Particles: "), // show no. particles
                    NUM_SPRITES_FIELD).build(),

                    // button to build more spheres
                    ButtonBuilder.create()
                        .text("Regenerate")
                        .onMousePressed(new EventHandler() {
                            @Override
                            public void handle(MouseEvent arg0) {
                                generateManySpheres(150);
                            }}).build(),

                    // button to freeze game loop
                    ButtonBuilder.create()
                        .text("Freeze/Resume")
                        .onMousePressed(new EventHandler() {

                            @Override
                            public void handle(MouseEvent arg0) {
                                switch (gameLoop.getStatus()) {
                                    case RUNNING:
                                        gameLoop.stop();
                                        break;
                                    case STOPPED:
                                        gameLoop.play();
                                        break;
                                }
                            }}).build()
            ).build(); // (VBox) stats on children

        // lay down the controls
        getSceneNodes().getChildren().add(stats);
    }

    /**
     * Make some more space spheres (Atomic particles)
     */
    private void generateManySpheres(int numSpheres) {
        Random rnd = new Random();
        Scene gameSurface = getGameSurface();
        for (int i=0; i (gameSurface.getWidth() - (circle.getRadius() * 2))) {
                newX = gameSurface.getWidth() - (circle.getRadius()  * 2);
            }

            // check for the bottom of screen the height newY is greater than height
            // minus radius times 2(height of sprite)
            double newY = rnd.nextInt((int) gameSurface.getHeight());
            if (newY > (gameSurface.getHeight() - (circle.getRadius() * 2))) {
                newY = gameSurface.getHeight() - (circle.getRadius() * 2);
            }

            circle.setTranslateX(newX);
            circle.setTranslateY(newY);
            circle.setVisible(true);
            circle.setId(b.toString());

            // add to actors in play (sprite objects)
            getSpriteManager().addSprites(b);

            // add sprite's
            getSceneNodes().getChildren().add(0, b.node);

        }
    }

    /**
     * Each sprite will update it's velocity and bounce off wall borders.
     * @param sprite - An atomic particle (a sphere).
     */
    @Override
    protected void handleUpdate(Sprite sprite) {
        if (sprite instanceof Atom) {
            Atom sphere = (Atom) sprite;

            // advance the spheres velocity
            sphere.update();

            // bounce off the walls when outside of boundaries
            if (sphere.node.getTranslateX() > (getGameSurface().getWidth()  -
                sphere.node.getBoundsInParent().getWidth()) ||
                sphere.node.getTranslateX() < 0 ) {                 sphere.vX = sphere.vX * -1;             }             if (sphere.node.getTranslateY() > getGameSurface().getHeight()-
                sphere.node.getBoundsInParent().getHeight() ||
                sphere.node.getTranslateY() < 0) {
                sphere.vY = sphere.vY * -1;
            }
        }
    }

    /**
     * How to handle the collision of two sprite objects. Stops the particle
     * by zeroing out the velocity if a collision occurred.
     * @param spriteA
     * @param spriteB
     * @return
     */
    @Override
    protected boolean handleCollision(Sprite spriteA, Sprite spriteB) {
        if (spriteA.collide(spriteB)) {
            ((Atom)spriteA).implode(this);
            ((Atom)spriteB).implode(this);
            getSpriteManager().addSpritesToBeRemoved(spriteA, spriteB);
            return true;
        }
        return false;
    }

    /**
     * Remove dead things.
     */
    @Override
    protected void cleanupSprites() {
        // removes from the scene and backend store
        super.cleanupSprites();

        // let user know how many sprites are showing.
        NUM_SPRITES_FIELD.setText(String.valueOf(getSpriteManager().getAllSprites().size()));

    }
}

Atom

The Atom class extends from the Sprite class. An atom is a sprite that appears like a spherical object that moves across the scene. An atom will have a random radius, color, and velocity. As each atom sprite collides with another atom they will animate a fade transition (the implode() method).
Shown below is the source code. Click to expand.

package carlfx;

import carlfx.gameengine.GameWorld;
import carlfx.gameengine.Sprite;
import javafx.animation.FadeTransitionBuilder;
import javafx.event.ActionEvent;
import javafx.event.EventHandler;
import javafx.scene.paint.Color;
import javafx.scene.paint.RadialGradient;
import javafx.scene.paint.RadialGradientBuilder;
import javafx.scene.paint.Stop;
import javafx.scene.shape.Circle;
import javafx.scene.shape.CircleBuilder;
import javafx.util.Duration;

/**
 * A spherical looking object (Atom) with a random radius, color, and velocity.
 * When two atoms collide each will fade and become removed from the scene. The
 * method called implode() implements a fade transition effect.
 *
 * @author cdea
 */
public class Atom extends Sprite {

    public Atom(double radius, Color fill) {
        Circle sphere = CircleBuilder.create()
                .centerX(radius)
                .centerY(radius)
                .radius(radius)
                .cache(true)
                .build();

        RadialGradient rgrad = RadialGradientBuilder.create()
                    .centerX(sphere.getCenterX() - sphere.getRadius() / 3)
                    .centerY(sphere.getCenterY() - sphere.getRadius() / 3)
                    .radius(sphere.getRadius())
                    .proportional(false)
                    .stops(new Stop(0.0, fill), new Stop(1.0, Color.BLACK))
                    .build();

        sphere.setFill(rgrad);

        // set javafx node to a circle
        node = sphere;

    }

    /**
     * Change the velocity of the atom particle.
     */
    @Override
    public void update() {
        node.setTranslateX(node.getTranslateX() + vX);
        node.setTranslateY(node.getTranslateY() + vY);
    }

    @Override
    public boolean collide(Sprite other) {
        if (other instanceof Atom) {
            return collide((Atom)other);
        }
       return false;
    }

    /**
     * When encountering another Atom to determine if they collided.
     * @param other Another atom
     * @return boolean true if this atom and other atom has collided,
     * otherwise false.
     */
    private boolean collide(Atom other) {

        // if an object is hidden they didn't collide.
        if (!node.isVisible() ||
            !other.node.isVisible() ||
            this == other) {
            return false;
        }

        // determine it's size
        Circle otherSphere = other.getAsCircle();
        Circle thisSphere =  getAsCircle();
        double dx = otherSphere.getTranslateX() - thisSphere.getTranslateX();
        double dy = otherSphere.getTranslateY() - thisSphere.getTranslateY();
        double distance = Math.sqrt( dx * dx + dy * dy );
        double minDist  = otherSphere.getRadius() + thisSphere.getRadius() + 3;

        return (distance < minDist);
    }

    /**
     * Returns a node casted as a JavaFX Circle shape.
     * @return Circle shape representing JavaFX node for convenience.
     */
    public Circle getAsCircle() {
        return (Circle) node;
    }

    /**
     * Animate an implosion. Once done remove from the game world
     * @param gameWorld - game world
     */
    public void implode(final GameWorld gameWorld) {
        vX = vY = 0;
        FadeTransitionBuilder.create()
            .node(node)
            .duration(Duration.millis(300))
            .fromValue(node.getOpacity())
            .toValue(0)
            .onFinished(new EventHandler() {
                @Override
                public void handle(ActionEvent arg0) {
                    isDead = true;
                    gameWorld.getSceneNodes().getChildren().remove(node);
                }
            })
            .build()
            .play();
    }
}

Conclusion

Hopefully you’ve got a chance to understand the fundamentals of a gaming loop and later apply the knowledge by implementing a robust game engine. Although, I briefly mention collision I am saving that for Part 4 of these tutorials. Please stay tuned for Part 3 where we will get into input using the keyboard or mouse. Feel free to experiment. Let me know what you come up with. 😉

Carl

UPDATE: Link to the source code is below:

To obtain the source code please download the link to a jar file below by using the ‘Save link As‘ option in your browser. If you are on a Windows system you can change the extension from ‘jar‘ to ‘zip‘ to be easily expanded. It will contain a directory ‘src‘ with the source code.

The source code location:

http://www.jroller.com/carldea/resource/javafx2.0_games/part2source_code.jar

The published version of the source code is at the GitHub called (JFXGen) for you to clone and fork to your hearts content (It’s there for you to use for your own projects). Enjoy.

https://github.com/carldea/JFXGen

git clone http://github.com:carldea/JFXGen.git

References:

CRTshttp://en.wikipedia.org/wiki/Refresh_rate

Double bufferinghttp://en.wikipedia.org/wiki/Double_buffering#Double_buffering

Developing Games in Java by David Brackeen with Bret Barker and Laurence Vanhelsuwe. Page 56 “Getting Rid of Flicker and Tearing”
BufferStrategy API – http://docs.oracle.com/javase/7/docs/api/java/awt/image/BufferStrategy.html

JavaFX 2 GameTutorial Part 1

SpaceshipFX

figure 1 SVG of a spaceship

Introduction

I believe most software developers at one point in their lives as a youngster (young person) may become compelled to create games to help them learn a programming languages (I know I did). Back in the day my first computer was actually a Franklin Ace 1000 and later an Apple ][. While developing games on those systems it was pretty challenging. For starters you had to learn assembly language (6502) and there were virtually little to no tools to create sprites (graphics assets). One of my favorite games that I believe was probably the first real time strategy (RTS) game was Rescue Raiders (1984).

Let’s fast forward to 2012 where computers, graphics tool kits, libraries, and game engines have come a long way since then. Many APIs will provide much of the plumbing that will shield the user of the API so that they may focus on making their games fun and exciting. Speaking of APIs JavaFX 2.x is not only a great UI toolkit to create nice looking applications, but you can make fun games. With JavaFX 2.x you will be able to create games that can kill time with hours of fun!

Growing up I was always fascinated with science fiction movies such as Star wars and Star trek. I’ve always wanted to create a simple top view display game (2D) where I could control my spaceship similar to the classic game Asteroids. However as time went by a friend shared with me the game Star Craft 1 and Brood wars I was just astonished. I really like the game play still to this very day, so I wanted to adopt some of the elements of the game such as navigating units and troops using the mouse pointer and buttons (ie: The Terran Battle Cruiser).

In this blog entry (Part 1) I will briefly explain the game play and how to navigate a spaceship using simple shapes (circles and lines). There isn’t any code to show you in part 1 (this blog entry), but a simple application to demonstrate how the ship will behave in the final game. As we progress through the series you will notice incremental changes such as cool sprites, sounds, etc. Remember the final game will just be a spaceship avoiding enemy ships and firing back with sound effects. The ship will appear like the one depicted at the beginning of this blog entry (figure 1).

I would like to create a series of blog entries (six parts) detailing tutorials to create a JavaFX 2.x game. Below is a brief summary of the series:

Part 1 – Introduction (Click here to run demo)
Part 2 – Game loop
Part 3 – Input / (Mouse, Keyboard)
Part 4 – Sprites / Collision
Part 5 – Sound
Part 6 – Concluding thoughts

Requirements & Design

  • Create a prototype of a spaceship using basic shapes.
  • Rotate the spaceship clockwise or counter clockwise depending on the screen location of a right mouse click.
  • Fire a projectile when the primary mouse button is pressed.
  • Display the mouse press (x, y) screen coordinates
  • Display angle of rotation when the ship’s nose (front of the ship) from zero degrees (0,0) to (1,0) [Cartesian system].
  • Display the direction (clockwise or counter clockwise) of the rotation of the spaceship

Shown in figure 2 is a simple prototype using simple shapes to help us focus on the math. A good principle is to create a functional prototype before investing a lot of time in drawing your graphics assets.

spaceship protype

figure 2 Spaceship Prototype

  • (MX, MY) – Mouse press (x, y) coordinate space on the JavaFX Scene.
  • (vx, vy) – End angle or mouse press(x, y) coordinate converted to Cartesian coordinates relative to the center of the ship.
  • (ux, uy) – Start angle or previous mouse press(x, y) coordinate converted to Cartesian coordinates relative to the center of the ship.
  • U’s angle: The angle of the start of the ships nose rotation. In a Cartesian coordinate system (1,0) the nose is pointing west or zero degrees. As the ship rotates counter clockwise the angle increases. When moving in a clockwise direction the rotation angle will be negative numbers.
  • V’s angle: The angle of the ships nose rotation where it should stop. In a Cartesian coordinate system (1,0) the nose is pointing east or zero degrees. As the ship rotates counter clockwise the angle increases. When moving in a clockwise direction the rotation angle will be negative numbers.
  • Direction: The rotation of the ship nose to turn the ship clockwise or counter clockwise. When clicking the mouse to turn the ship when less than 180 degrees the ship will turn towards the mouse click instead of turning the other way which is greater than 180 degrees (the long way).

Demo

Requirements:

  • Java 7 or later
  • JavaFX 2.0 or later
  • Windows XP or later (Should be available soon for Linux/MacOS)

A simple prototype of the navigation and weapon systems for the spaceship.

Instructions:

  • Right click (on Windows) mouse to fly ship.
  • Primary (left click on Windows mouse) to fire weapon.


Click here to run demo

References

Franklin Ace – Vintage Computer : http://www.vintage-computer.com/franklin.shtml

Apple ][ – Vintage Computer: http://en.wikipedia.org/wiki/Apple_II

Rescue Raiders – Wikipedia: http://en.wikipedia.org/wiki/Rescue_Raiders

Star wars – Movie Database: http://www.imdb.com/title/tt0076759/

Star trek – Movie Database: http://www.imdb.com/title/tt0796366/

Star craft – Wikipedia: http://en.wikipedia.org/wiki/Star_Craft

Star craft Brood wars – Wikipedia: http://en.wikipedia.org/wiki/StarCraft:_Brood_War

Rescue Raidershttp://en.wikipedia.org/wiki/Rescue_Raiders